Creating and Configuring the Knowledge Workspace
Enable the knowledge workspace by selecting the knowledge.SelfServiceNextgen layout for knowledge object workspace. You can configure this layout in both grid and form views.
Additionally, you can also refine the knowledge content by adding object filters. For example, if you want to display only published knowledge articles, you can include that filter under object permissions.
To configure your knowledge workspace:
1.Log in to Ivanti Neurons for ITSM as Administrator.
2. From the Configuration console, click User and Permissions > Role and Permissions. Select Self Service role. The Role: SelfService page appears.
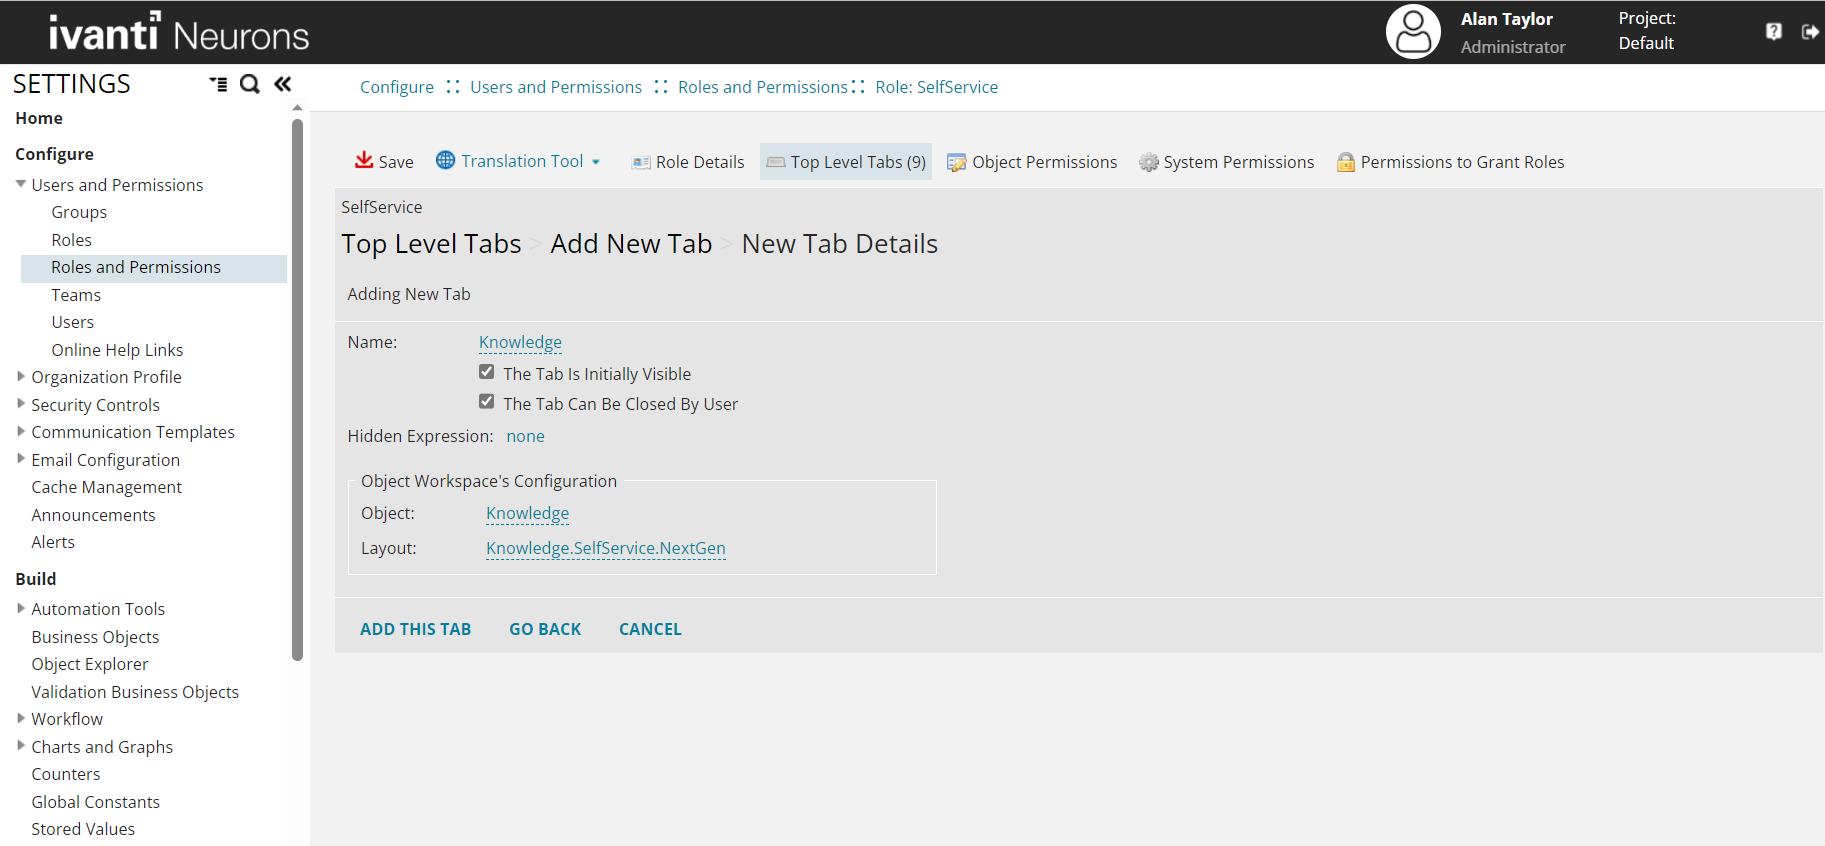
3.Click Top Level Tabs, and then click Add New Tab.
4.Under Add New Tab, click Object Workspace.
5.Under Adding New Tab pane, enter Knowledge in the Name field.
6. In the Object Workspace's Configuration pane, select the following in the Object and Layout fields:
•Object: Knowledge
•Layout : Knowledge (Knowledge.SelfService.NextGen)
To create custom filters:
1.Log in to Ivanti Neurons for ITSM as Administrator.
2. From the Configuration console, click Search Tools > Filter Searches.
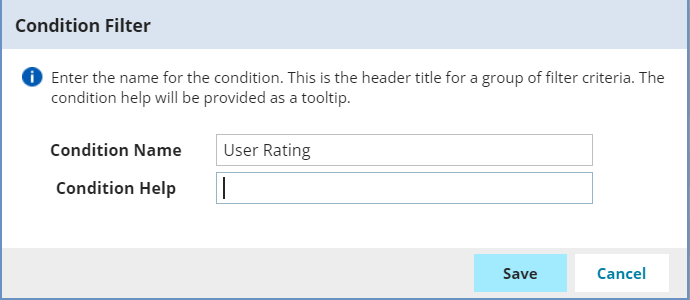
3.Under FRS Knowledge, click Add Filter. The Condition Filter dialog box appears.
4.Specify the following:
•Condition Name
•Condition Help
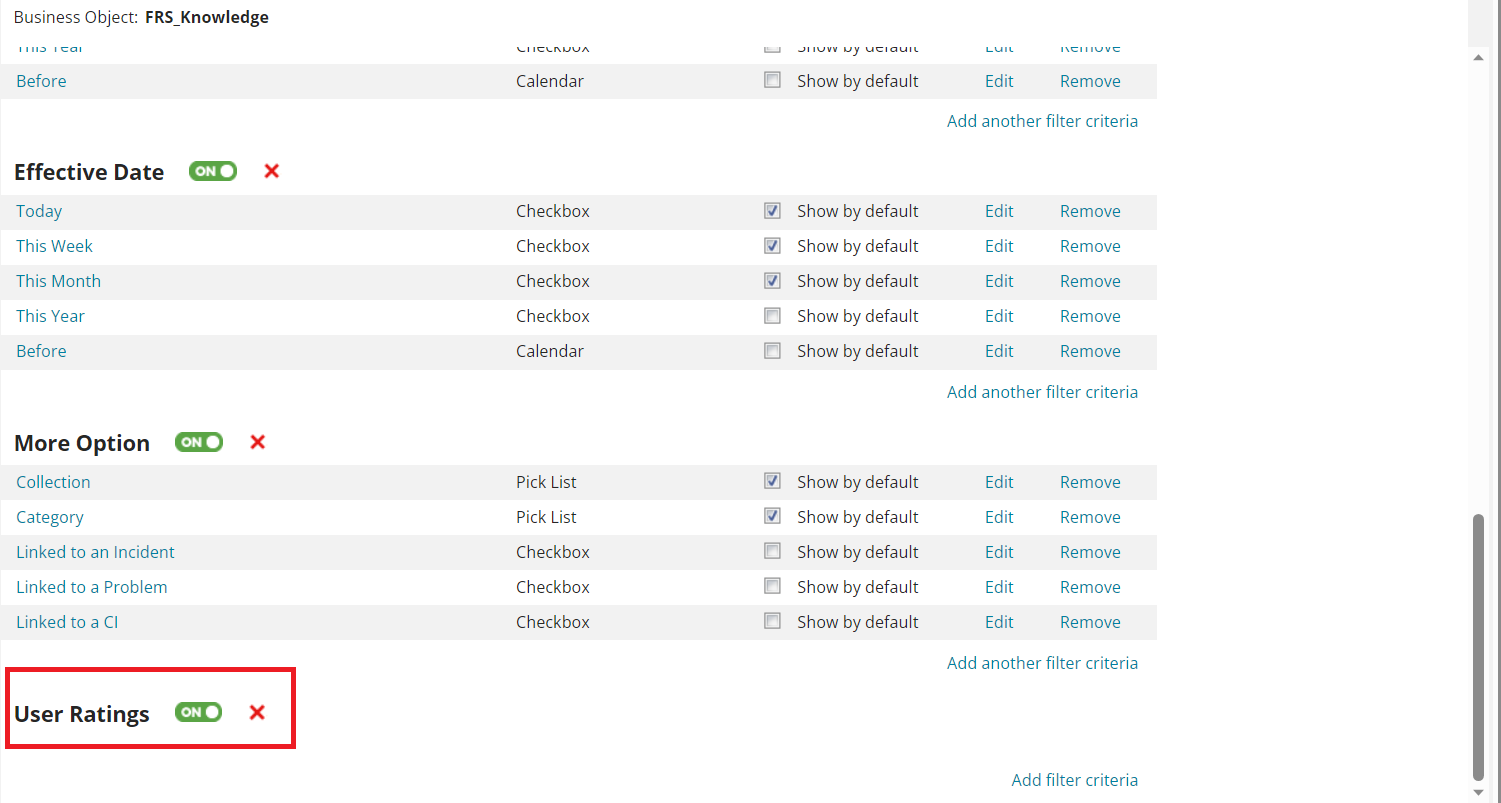
5.Click Save. The filter is added under Business Object: FRS_Knowledge.
6.Click Add Filter Criteria. The Filter Criteria dialog box appears.
7.Specify the following:
•Label
•Control
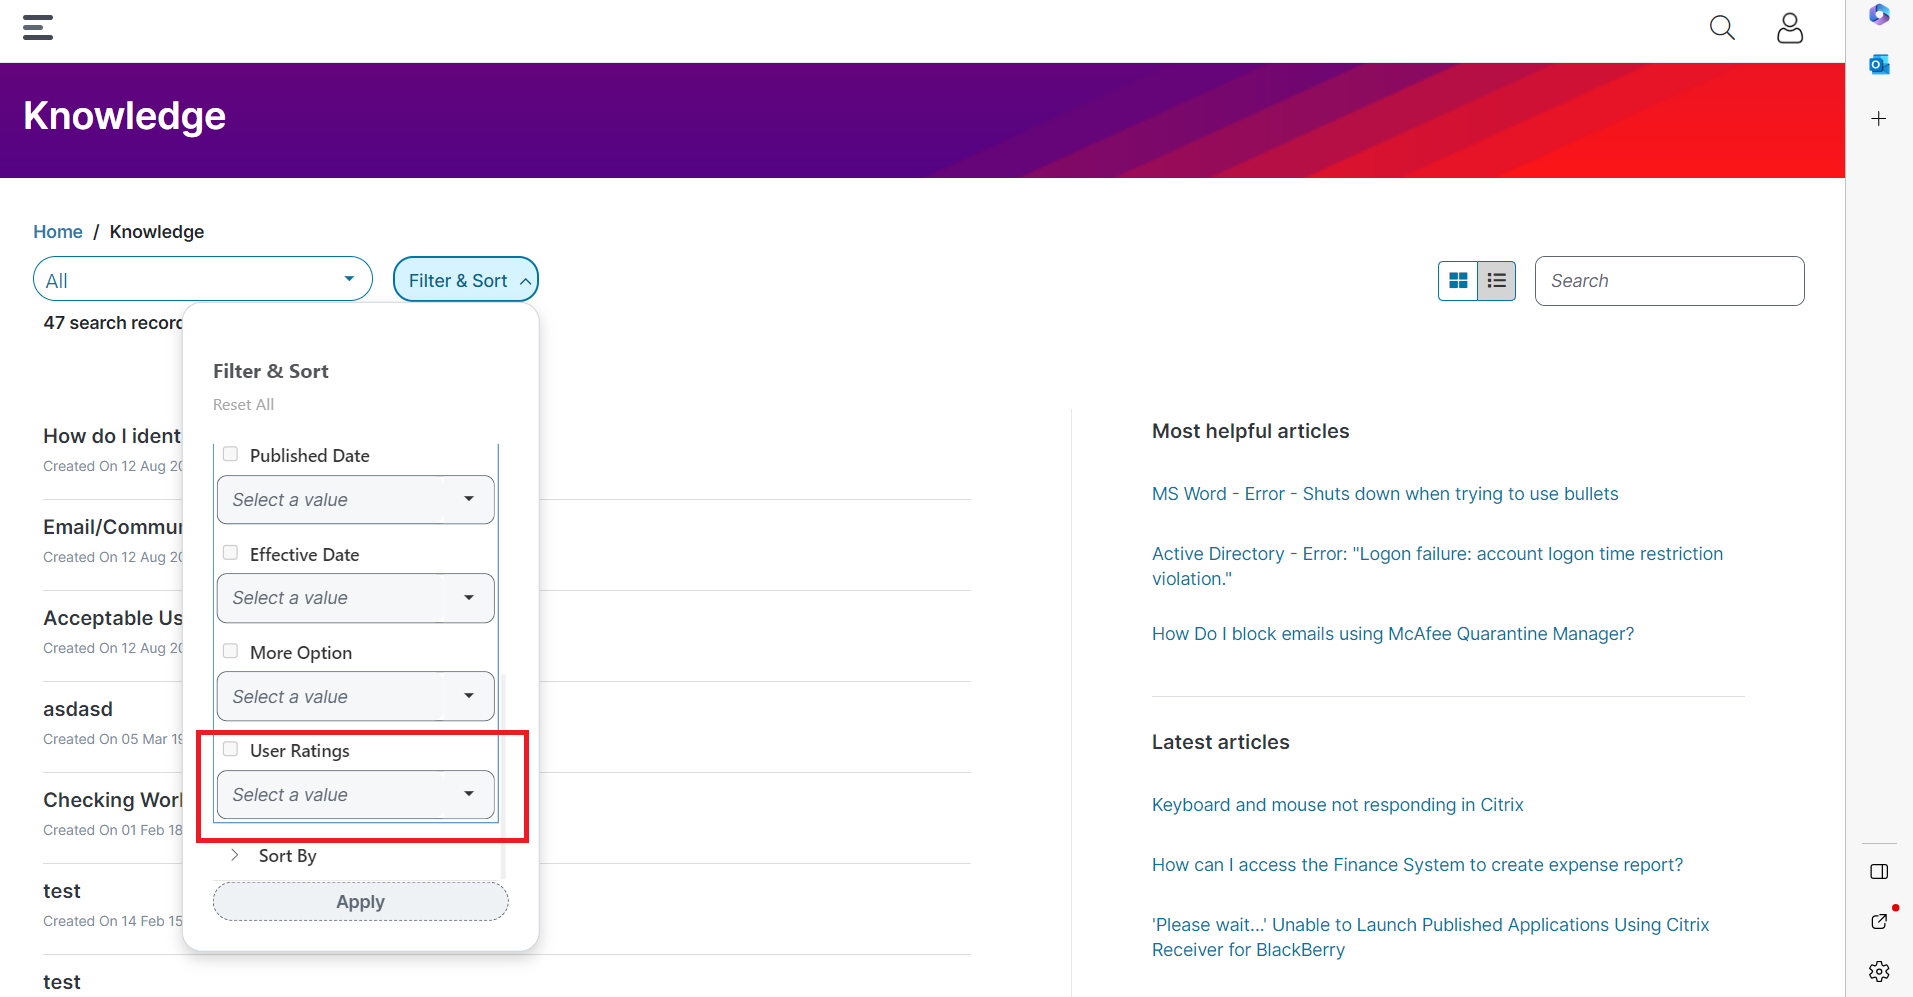
8.Click Save. When the user logs in with the Self Service role, they can find the newly created filter under Filter and Sort .
The following example shows how to create a User Rating filter for Knowledge.
1.Log in to Neurons for ITSM as Administrator.
2. From the Configuration console, click Search Tools > Filter Searches.
3.Under FRS Knowledge, click Add Filter. The Condition Filter dialog box appears.
4.Specify the following:
•Condition Name - In this example, enter User Ratings.
The newly created filter is added.
5.Click Add Filter Criteria. The Filter Criteria dialog box appears. Specify the following:
•Label: In this example, enter user rating.
•Control: In this example, select checkbox.
•Expression: In this example, select Knowledge, User Rating, and Equal to from the drop-down list, and enter 3 in the Fx field.
6.Click Save, Now log in as a Self service role, and click Filter and Sort drop-down list, you can view the User Rating filter.
Enable settings to add ratings and feedback in the knowledge workspace. Additionally, you can separately enable average ratings for each knowledge article. With these settings, self-service users can add ratings, provide feedback, and view the average ratings of each knowledge article.
To enable user ratings and feedback:
1.Log in to Ivanti Neurons for ITSM as Administrator.
2.Click Edit Page on the top-right corner of the page. The Page Designer page appears.
3.In the center of the Page Designer page, select Knowledge Base from the drop-down list.
4.Navigate to Page Settings > Feedback Porperties
5.Click the toggle buttons for the following options:
•Was this article helpful?
•Rate this article
•Comments
6.Click Publish to apply and publish the configuration.
To enable the average ratings:
1.Log in to Ivanti Neurons for ITSM as Administrator.From the Configuration console, navigate to Build > Business Objects .
2.Click Knowledge workspace. The Business Object FRS_Knowledge page appears.
3.Under Layouts, locate and click Knowledge.SelfService.NextGen. The Edit Layout: Knowledge.SelfService.NextGen page appears.
4.Click Edit. Under ToolBox section, click FRS_Knowledge(Knowledge) > Fields. Drag and drop User Rating field into the List pane.
5.Click Save. The existing rating of an article is displayed in the Self Serive Management.


